Wednesday, November 8, 2017

Warning: new nvidia drivers in Fedora

If you have followed my instructions on setting up a system to use Nvidia drivers, things have worked pretty good until now.

This week I noticed that xorg-x11-drv-nvidia-384.90-1 has been pushed out from the rpmfusion non-free repo. (The previous driver was 384.59-2.) At first glance, you might not think too much about it. Its a small number bump.

If you reboot your system and you find that you no longer have a high resolution desktop or Cinnamon says its running in software emulation mode instead of hardware accelerated mode...then you have a problem.

To fix it, run the following command as root:

grubby --remove-args="nomodeset nvidia-drm.modeset=1" --update-kernel=ALL

The new driver is aimed at some work going on for Fedora 27 wayland support. It does not like mode setting and it does not like the way GDM does things. So, you have to get rid of it from all menu items by using the above command.

The next thing you may notice is that your AI programs don't run anymore. This is because we now have a CUDA driver mismatch. In the cuda8-samples package that is distributed as part of the CUDA 8 developer's toolkit, (which I also have you to compile when setting up a CUDA environment) you will find a utility called, deviceQuery. Run this and you will see something like this:

deviceQuery, CUDA Driver = CUDART, CUDA Driver Version = 9.0, CUDA Runtime Version = 8.0, NumDevs = 1, Device0 = GeForce GTX 1050 Ti

As you can see, we have CUDA 9 drivers now and a CUDA 8 runtime. That means we need to update our CUDA runtime environment to version 9 and recompile our AI programs to the new API.

For now, just know that this issue exists. If you are adventurous, go ahead and convert. (CUDA 9 has lots of new stuff.) I'll write about how to do the update in a future blog.

Another alternative is to not allow the xorg-x11-drv-nvidia update for now. With Fedora 27 just around the corner, we're all going to have to update to CUDA 9 anyways. But you can delay until you're ready to upgrade.

Tuesday, October 10, 2017

Upgrading your R libraries after OS upgrade

I recently posted about how to do an upgrade to Fedora 26 while maintaining the Nvidia drivers. So, what are you supposed to do with your R libraries you downloaded? If you try to use audit-explorer in RStudio, you'll get an error because system library versions have changed.

There are instructions on the web about how to do this. They basically say to run:

update.packages(ask=FALSE, checkBuilt = TRUE)


This basically works fine in some cases, but in our case the OS was upgraded and R can't tell that anything needs to be done because our R libraries were up to date before upgrading the OS.

We can run a script to remove and re-install the old libraries. The script works because the R libraries on the system were upgraded when you went to F26. All we need to do is rebuild the ones kept in your home dir.

The following script should be self explanatory.

# Ask R where it keeps its libraries
all <- .libPaths()

# Ask R where its system libraries are
site <- .Library.site

# Now subtract one from the other to get your home dir libraries
loc <- setdiff(all, site)

# Take a look at loc to ensure it only point to the R directory in your home dir
loc

# Ask R for the list of packages in your home dir
plist <- installed.packages(lib.loc = loc)
df <- as.data.frame(plist)
# Take a look at the packages to ensure this looks about right
#View(df)

# Get rid of the old ones
for (p in df$Package) { remove.packages(p) }

# Reinstall the packages
for (p in df$Package) { install.packages(p) }

When you run this, single step one line at a time. Do not run the whole thing. Single step it to the point where it outputs 'loc'. Does it look like a directory in your home dir? I get

"/home/sgrubb/R/x86_64-redhat-linux-gnu-library/3.4"

OK. Now single step down to the View(df) call. Uncomment that if you want. It shows a real nice table of all the package info.

Now its time for the scary part...deleting all the packages. Step over the first for loop. You will see a whole bunch of red text scroll in the Console pane. This is normal.

Now to put it all back, step over the last for loop. RStudio  will ask you if you want to restart R prior to installing. Tell it yes. It will ask again. This time cancel it by clicking on the X in the corner of the dialog. The dialog will pop up again and again. Click the X to close it. At some point it thinks it finished your for loop and it didn't. You can tell because you see an empty cursor ready to use in the console pane.

Fear not. Run the last for loop again. This time it will be unimpeded and will proceed to download and install all of your packages.

Whatever you do, do not exit RStudio until it after the second run of the for loop finishes. This can take 10 or 20 minutes depending on how many libraries you have. Exiting before the building finishes will surely lose the list of packages. You can tell its done because the Console pane is ready to use again.


Conclusion
When you upgrade the OS, sometimes R libraries won't work and upgrading doesn't work because you are on the latest version. The solution is running a script. It is not without danger, but it does the trick.

Tuesday, October 3, 2017

Upgrading to F26 while running nvidia drivers


Originally, I planned to post a much bigger article. I run with the rpmfusion-nonfree-updates-testing.repo enabled. I would not recommend that for most people. The reason being is that the released version of the nvidia drivers is 375.66. This is cuda 8. If you run with the testing repo you will get version 384.90. This one is cuda 9. That means redoing your whole environment. So, we'll save that for another blog post. Meanwhile let's go over how to do the upgrade.

Upgrading to F26
Upgrading to F26 from F25 was pretty smooth. I had to uninstall RStudio, but I already had the recipe to rebuild it. I followed the normal fedora upgrade instruction except I took one small deviation. If you use nvidia drivers, you probably have noticed that when you install a new kernel, akmods builds a couple new rpms and installs them on system shutdown. This way when you boot back up, the new kernel has matching drivers.

My concern was how does this work when upgrading the whole OS via dnf? What I did was:

  1. Let dnf download all the packages as normal.
  2. Reboot the system per dnf instructions so it can install them.
  3. After it had installed all the new F26 packages, I watched carefully for the grub boot menu to appear. I edited the first entry to add a 3 at the end. This causes it to boot into runlevel 3 which is non-graphical.
  4. Then I logged in, looked around to see how the upgrade went, and then did a reboot to go to try graphical mode. Doing a test boot into text mode was just in case it needed to build the rpms for the new F26 kernel during shutdown.

Sure enough, that is what happened. It started a shutdown job and built the new kernel modules and installed them. It came back up in graphical mode just fine.

In the near future, I write about switching to cuda 9. If you don't have to, I wouldn't for now.

Monday, October 2, 2017

Sometimes it takes two objects

Work is progressing on an upcoming release of the audit user space software. During the work to create text representations of the event, I found that some ideas just can't be adequately captured in the normalized view. For example, if admin mounted a disk drive all we could say is that a disk was mounted. But in truth, the admin mounted the disk to a specific place in the file system. How do we capture that? It is important.

After a while, I decided that sometimes there are simply two objects. The admin mounted this(1) to that(2). To address this the auparse library will assign fields to object2 (which is formally called primary2) whenever it sees the following:

1) Files are renamed by using the rename* syscalls
2) Files receive permission or ownership changes
3) Files get symlinked to
4) Disk partitions get mounted to a directory
5) Whenever uid or gid changes as a result of calling set*uid or set*gid syscalls

There may be other cases, so don't consider this the final specification. As I see more events, I'll add to this when necessary. Or if you have some ideas about when there might be a second object, leave a comment or email me.

Because this is a sparse column, it will not be enabled by default when the csv format is selected. To get it, you will need to pass --extra-obj2 to the ausearch program.

If however, you are a software developer, then you can get access to the normalized output via a new auparse_normalize_object_primary2 function. The way that it would be used in practice is similar to any of the other normalizer accessor functions. You would do something like this:


    rc = auparse_normalize_object_primary2(au);
    if (rc == 1) {
            const char *val;

            if (auparse_get_field_type(au) == AUPARSE_TYPE_ESCAPED_FILE)
                    val = auparse_interpret_realpath(au);
            else
                    val = auparse_interpret_field(au);
            printf("%s", val);
    }


This new function is not yet available unless you use the source code from github. This will be in the next release, audit-2.8, which should be out in the next week or two. Which reminds me...if you know of any issues in the audit code, now would be a good time to report it.

Tuesday, September 26, 2017

Some security updates in RHEL 7.4

RHEL 7.4 has been out for a little while now. And with Centos build 1708 recently released, there are a couple new security features that I would like to take a moment to highlight.

yama ptrace control
The first item is a new sysctl setting, kernel.yama.ptrace_scope. This is used to control ptracing of processes. If you allow ptracing of processes, this also allows processes or in memory data to be altered. This can be used to do something referred to as process hollowing or process injection. This means the process starts up but gets modified so that it doesn't do what its supposed to do.

To prevent this form of attack, we can use  kernel.yama.ptrace_scope to set who can ptrace. The different values have the following meaning:

# 0 - Default attach security permissions.
# 1 - Restricted attach. Only child processes plus normal permissions.
# 2 - Admin-only attach. Only executables with CAP_SYS_PTRACE.
# 3 - No attach. No process may call ptrace at all. Irrevocable until next boot.

You can temporarily set it like this:
echo 2 > /proc/sys/kernel/yama/ptrace_scope

To permanently set it, edit /etc/sysctl.conf. If you have a system in a DMZ or with sensitive information, I'd recommend a value of 3. I'd go with a 2 for production machines and a 1 for everyone else. Also while you are in there you might want to see if you are setting any of these other security related sysctls:

kernel.kptr_restrict = 1
kernel.dmesg_restrict = 1
kernel.perf_event_paranoid = 2
kernel.kexec_load_disabled = 1


jitter entropy source
RHEL 7.4 also picked up the jitter entropy source. This entropy source mines the natural jitter that exists in the execution of CPU instructions. This helps Linux a whole lot because typically Linux kernel are starved for entropy. There
is one catch ... some people in the upstream community think that jitter from the CPU leans towards being deterministic. So, they do not want to automatically stir it into the entropy pool. This means that you must run rngd to get the benefit of this new entropy source. Also, note that rngd only moves entropy from hardware generators to the kernel entropy pool. It in no way creates entropy.


audit events as text
If you read my blog then you know that there have been improvements for being able to understand what the events mean. You can take the ugly and nearly unreadable audit events and have them turned into english sentences. To do
this you just pass --format=text to the ausearch command.


proctitle added to audit events
The new RHEL 7.4 kernel now includes a proctitle record. The proctitle record gives the command line and its arguments for any syscall filter originating event. This is useful to see how commands were invoked in case the arguments are important to an investigation.

Friday, August 11, 2017

Updated Rstudio SRPM available which fixes build on Fedora 26

So, Fedora 26 is out. And with it comes a new openssl which is ABI incompatible with some programs. Turns out one of those is Rstudio. I presume the people at Rstudio are working on migrating to the new openssl. But in the meantime you may want to use Rstudio on F26.

Download here:
http://people.redhat.com/sgrubb/files/Rstudio/

If you are on Fedora 26, you will need to install the compat-openssl-devel package.

$ dnf install compat-openssl10-devel --allowerasing


This will delete openssl-devel, but you can re-install it later after Rstudio is built. If you are building it for the first time, there are some instructions here.

If you migrated from F25 you should update all your plugins from within Rstudio as recommended in a prior post.

Sunday, August 6, 2017

Super Resolution with Neural Enhance

[This article is rich in hyperlinks. I chose these to do a better job of explaining things than I can normally do. Please visit them.]

In the last blog posting, I talked about how to setup Theano on Fedora 25. Setting this up is pointless if you don't have a goal. There is a really cool application of Deep Learning that has on been published for about a year or two. Its called super resolution. Do you remember that scene in Blade Runner where Harrison Ford's character is analyzing a photo he found and zooms into the mirror to see around the corner? Well, we pretty much have that today. To get properly oriented on this topic, please watch this video:

https://www.youtube.com/watch?v=WovbLx8C0yA

OK. Are you interested in seeing something cool?


Neural Enhance
There is a project on github, neural-enhance, that houses some code that does super resolution. Log in to your AI account that was setup for theano. Then, grab yourself a copy of the code:

$ git clone https://github.com/alexjc/neural-enhance.git

Now, we need to install the dependencies for neural-enhance. It needs a couple things from Continuum Analytics. But neural enhance also calls out for a very specific check-in hash of the Lasagne framework. It appears to be a bug fix. (Just in case you are not familiar, Lasagne is a high level framework, similar to Keras, that you tell it what you want to make and how the layers are connected, and it makes it.) It would appear that Lasagne developers have not made a release in a long time hence the special version.

$ conda install pip pillow colorama
$ python3.6 -m pip install -q -r "git+https://github.com/Lasagne/Lasagne.git@61b1ad1#egg=Lasagne==0.2-dev"

OK. Neural Enhance has some pre-trained models that you can download to experiment with. Time to get some models.


$ cd neural-enhance
$ wget https://github.com/alexjc/neural-enhance/releases/download/v0.3/ne2x-photo-default-0.3.pkl.bz2
$ wget https://github.com/alexjc/neural-enhance/releases/download/v0.3/ne4x-photo-default-0.3.pkl.bz2
$ wget https://github.com/alexjc/neural-enhance/releases/download/v0.3/ne1x-photo-deblur-0.3.pkl.bz2
$ wget https://github.com/alexjc/neural-enhance/releases/download/v0.3/ne1x-photo-repair-0.3.pkl.bz2

We have everything...so let's try it out. Andrew Ng says that AI today is good at mapping A to B. (Specifically, see what he says at 4 minutes into the clip. This is such an amazing talk, it worth watching in its entirety.) Given data of type A, map it to B. I would like to test this using neural enhance. The program claims to have 3 capabilities: zooming for super resolution, deblurring, and denoising pictures. I would like to test the deblurring capability because that is the least subjective output. Given a blurry image, can it create output I can read?

To do this experiment, what I did, is get a screenshot of a malware article on "The Register". I loaded that into gimp and then made 3 pictures applying an 8, 12, and 16 pixel Gaussian blur. They look like this:


8x blur

12x

16x

As you can see, the 8x is not to hard to read. If you never saw the article, you could probably make out what its about. The 12x is nearly impossible. And the 16x is impossible. Can we decipher this with AI? Let's see...

To use the default model that comes with neural enhance, we would run it as follows. Note that when using the ai account, its not the account that I logged into my desktop with. So, I pass pictures between the accounts through the /tmp directory.

$ python3.6 enhance.py --type=photo --model=deblur --zoom=1  /tmp/screenshot-blurx8.png


On my system, this takes about 20 to 25 seconds to complete. I get the following picture:


Hmm...color me not impressed. Its better, but its not the jaw dropping wow that I was looking for. How about if we run the enhanced picture back through and enhance it a second time?


I'm still not impressed. And if its that fuzzy on 8x, then it has no hope of doing the 12x or 16x. At this point you may be wondering why I'm wasting your time and had you to go through all the trouble of setting up theano with the promise of something cool. I wondered, too. Then I realized that if you want something done right, you gotta do it yourself.


Training your own model
The default models that come with neural enhance are general models trained with all kinds of pictures. If we are trying to deblur text, would a model trained on dogs, cats, birds, trees, cars, and whatever really give the best results? Having 20 - 20 hind sight, I can say no.

So, in the neural-enhance project directory, there is a subdirectory called train. We will go into it and download a general network model and start training our own. In the train directory, I created subdirectories called text-samples and model-backup. The training process is two steps and I wanted to make a backup between runs - just in case. Regarding the text-samples, I made screenshots of 25 articles from 5 different web sites. I chose articles with no pictures to make the model tuned specifically for text. Another rule is that you should not put the text image that we are using judge the model with into the training samples. That would be cheating. OK, let's start...

$ cd train
$ mkdir model-backup
$ mkdir text-samples
$ cp /tmp/text-samples/*  text-samples/
$ wget https://github.com/alexjc/neural-doodle/releases/download/v0.0/vgg19_conv.pkl.bz2
$ ln -s ../enhance.py enhance.py
$
$ python3.6 enhance.py \
    --train "text-samples/*.png" --type photo --model unblur \
    --epochs=50 --batch-shape=240 --batch-size=12 --buffer-size=1200 \
    --device=gpu0 \
    --generator-downscale=2 --generator-upscale=2 \
    --generator-blocks=8 --generator-filters=128 --generator-residual=0 \
    --perceptual-layer=conv2_2 --smoothness-weight=1e7 \
    --adversary-weight=0.0 \
    --train-noise=10.0 --train-blur=4

I have a beefy GTX 1080 Ti. It took a little over 4 hours to run the pre-training. At first I was getting "unable to allocate memory" errors. After some research I found that the batch-size and buffer-size controlled how much memory was used. If you hit this even with these settings, lower the batch-size to 8 or 6 or 4 and see if that fixes it. The 1080 Ti has 11 Gb of memory, so if you only have 4Gb, then you need to drastically reduce it. You can use a utility from nvidia to see how much video memory is being used.

$ nvidia-smi -l 1

Hit control-C to exit it. OK...4 hours have passed and its done. What we just did was the pre-training. The pre-training helps the real training be more successful in picking out what it needs to. In this round, the generative model is being trained. The next round adds the adversarial model to the training. I'll talk more about that after we kick off the real training.

$ cp ne1x-photo-unblur-0.3.pkl.bz2 model-backup/
$ python3.6 enhance.py \
    --train "text-samples/*.png" --type photo --model unblur \
    --epochs=250 --batch-shape=240 --batch-size=12 --buffer-size=1200 \
    --device=gpu0 \
    --generator-downscale=2 --generator-upscale=2 \
    --generator-start=10 \
    --perceptual-layer=conv5_2 --smoothness-weight=5e3 \
    --adversarial-start=10 --adversary-weight=5e1 \
    --discriminator-start=0 --discriminator-size=48 \
    --train-noise=10.0 --train-blur=4

OK, while that is running let's talk about the strategy. The program uses a generative adversarial network. This is basically two models, a generator and a discriminator, that play a game. The generator learns from the training data how to generate something that is similar to the training data. The discriminator judges the quality of the work. So, its like an artist creating fake paintings that are close enough to fool the art critic. During training each side gets better and better at the role it has to play. The generator gets better at creating fakes based on feedback from the discriminator, and the discriminator gets better at spotting fakes. The two have to balance to be useful.

Most training runs can take 500 to 1000 epochs or more to complete. I don't have that much time. So, I settled for 250 as a way to balance how much time I want to devote to this experiment vs having a model good enough to see if the technique is working. During the training, my 1080 Ti took about 130 seconds per epoch. That works out to be about 9 hours of runtime.

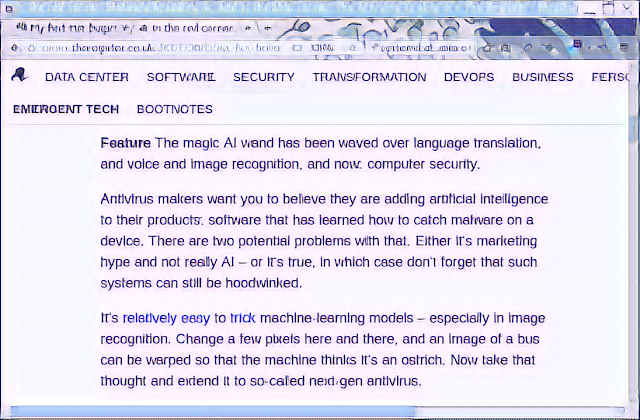
OK. 9 hours has passed. So, how does the new model work? Judge for yourself...this is the converted images:
8x

12x

16x

For the first one, the text is pretty crisp. Much better than the default model. The second one you can see some noise starting to show up - but the text is easily readable. The real test is the final 16x image. It does have some noise in it. Perhaps more than 250 epochs of training would reduce that some more. Perhaps more text samples would help, too. But I have to say that it did an unbelievably good job of taking text that was so blurry that you could not read it and turn it into something so close that you can understand the article and guess what the mistakes were supposed to be.

The moral of this story is...do not depend on Gaussian blur as a way to obscure objects or text in a photo. All it takes is someone to come along with the right model and they can unmask the object.


Conclusion
In this article we've put Theano to use, learned how to train a model for super resolution, and saw that a general model is OK. But to get amazing results requires creating a tuned model for the exact job at hand. Neural enhance is also capable of zooming into pictures and augmenting the missing detail based on its models. The reader may want to experiment with this feature and create models useful for zooming or denoising. Have fun...

Saturday, August 5, 2017

Theano Deep Learning Framework on Fedora 25

 [This article is rich in hyperlinks. I chose these to do a better job of explaining things than I can normally do. Please visit them.]

A few articles ago we covered Torch 7 and how to set it up. There are several other frameworks that are important each having advantages in one area or another. Its important to have access to all of them because you never know when a killer app lands on any one of them. Today we will show how to setup theano. Theano is one of the older frameworks and takes a unique approach to GPU acceleration. When you run a program that uses GPU acceleration, it generates and compiles CUDA code based on what your program describes.


THEANO
In the last article about AI, I mentioned that you can setup an account specifically to run AI programs. This is because most of the frameworks install things to your home directory. Sometimes they want versions of things that clash with other frameworks. Sounds like a classic use case for containers. But I wanted to set this up on bare metal so let's dive in.

Theano is python based. It typically wants things that are newer than the system python libraries. So, I'll show you how to set all this up. If you want to create a new ai account, go ahead and do that and/or log in under the account you want to set this up in.

The first step is to download miniconda which is a scaled back version of anaconda which is a package installer used by Continuum Analytics. (There is some overlap in names with Anaconda the Fedora and Red Hat package installer. They are not the same.) They have lots of scientific computing packages ready to install. Look over this list to get a feel for it.

To install miniconda, do this:

wget https://repo.continuum.io/miniconda/Miniconda3-latest-Linux-x86_64.sh
bash Miniconda3-latest-Linux-x86_64.sh


Click through the license and accept the default locations.

Once it's done, source .bashrc to update your variables.

source ~/.bashrc

Now, let's install theano. First we need to tell it where our CUDA libraries are installed. If you need information on how to setup a CUDA development environment, see this blog post.

export CUDA_ROOT="/usr/local/cuda"
conda install theano pygpu python=3

This will download and install theano for python 3 and all its dependencies. Contiuum is shipping python 3.6 which is ahead of Fedora's python 3.5. Next create a .theanorc file in the homedir. In it, put this:

[cuda]
root = /usr/local/cuda

[nvcc]
flags = -std=c++11


This fixes the nvidia compiler to not choke on the gcc/glibc headers and in a more permanent way where to find the CUDA environment. It is also important at this point that you have fixed /usr/local/cuda/include/math_functions.h as I explained in the article about setting up your CUDA development environment. Theano is the one that chokes on that bad code.

Next, we should test the setup to see if it works. We will start with the bottom layer, pygpu. If this is not working, then something went wrong and nothing else will work. I took the following from this article: http://blog.mdda.net/oss/2015/07/07/nvidia-on-fedora-22. You don't have to make this a program. Just use the python shell.

$ python3
>>> import pygpu
>>> pygpu.init('cuda0')


If its working, you should see
<pygpu.gpuarray.GpuContext object at 0x7f1547e79550

Good. Let's exit.

>>> quit()


Now let's test theano itself. The idea here is to make sure it works with simple apps before you jump into a complex AI program and then find trouble. Let's make a program. Copy this into a file we'll call gpu_check.py in the homedir.


from theano import function, config, shared, sandbox
import theano.tensor as T
import numpy
import time

vlen = 10 * 30 * 768  # 10 x #cores x # threads per core
iters = 1000

rng = numpy.random.RandomState(22)
x = shared(numpy.asarray(rng.rand(vlen), config.floatX))
f = function([], T.exp(x))
print(f.maker.fgraph.toposort())
t0 = time.time()
for i in range(iters):
    r = f()
t1 = time.time()
print('Looping %d times took' % iters, t1 - t0, 'seconds')
print('Result is', r)
if numpy.any([isinstance(x.op, T.Elemwise) for x in f.maker.fgraph.toposort()]):
    print('Used the cpu')
else:
    print('Used the gpu')


We will run 2 tests. One to check that the CPU is working and one to see that the GPU is working.


# THEANO_FLAGS=mode=FAST_RUN,floatX=float32,device=cpu python3 gpu_check.py
# THEANO_FLAGS=mode=FAST_RUN,floatX=float32,device=gpu python3 gpu_check.py


When you test the gpu, if you see an errors like:

miniconda3/lib/python3.6/site-packages/numpy/core/include/numpy/ndarraytypes.h(84): error: expected a "}"
/home/ai3/miniconda3/lib/python3.6/site-packages/numpy/core/include/numpy/ndarraytypes.h(446): error: identifier "NPY_NTYPES_ABI_COMPATIBLE" is undefined
...
WARNING (theano.sandbox.cuda): CUDA is installed, but device gpu is not available  (error: cuda unavailable)
...
Used the cpu


This is normal the first time. You need to edit ~/miniconda3/lib/python3.6/site-packages/numpy/core/include/numpy/ndarraytypes.h.

On line 84, put the whole NPY_ATTR_DEPRECATE line in comments /* */ including the ending comma, save, and retest.

When you see:

Using gpu device 0: GeForce GTX 1080 Ti (CNMeM is disabled, cuDNN 5005)
...
Used the gpu


you are ready for theano...

Next blog post I'll show you something really cool that uses theano.

Wednesday, July 12, 2017

Interactive R programs

In the past, we have looked at using R to analyze audit data. The programs are kind of like batch processing. Whatever they do is predefined and you can't tell it to change without modifying the source code. Today we are going to take a look at how to make R application that respond to user input.


Shiny
The developers at RStudio created a way to marry web programming with R so that you have a web presentation layer and an R backend that responds to the changes. This brings a much needed capability because sometimes you want to see the data differently right away.

The shiny interface does bring with it a number of controls like Radio Buttons, drop down text boxes, sliders, charts, and boxes for grouping. You can take a look at a gallery of controls here.

To create a basic shiny app, open RStudio. Click on File|New File and then select "Shiny Web App". That brings up a dialog asking some basic questions. It asks what the application's name is. I put in Test. Then it asks if you want 1 file or 2. I select 1. If you choose 2, then it makes one file for the UI and one file for the back end. The last thing is to select the directory for the file. When you click on Create, it will open a file fully populated with a simple working app.

If you click "Run App", then you should have a program that looks something like this:


Moving the slider causes the histogram to change. Let's look at the code.

library(shiny)

# Define UI for application that draws a histogram
ui <- fluidPage(

   # Application title
   titlePanel("Old Faithful Geyser Data"),

   # Sidebar with a slider input for number of bins
   sidebarLayout(
      sidebarPanel(
         sliderInput("bins",
                     "Number of bins:",
                     min = 1,
                     max = 50,
                     value = 30)
      ),

      # Show a plot of the generated distribution
      mainPanel(
         plotOutput("distPlot")
      )
   )
)

# Define server logic required to draw a histogram
server <- function(input, output) {

   output$distPlot <- renderPlot({
      # generate bins based on input$bins from ui.R
      x    <- faithful[, 2]
      bins <- seq(min(x), max(x), length.out = input$bins + 1)

      # draw the histogram with the specified number of bins
      hist(x, breaks = bins, col = 'darkgray', border = 'white')
   })
}

# Run the application
shinyApp(ui = ui, server = server)


There are 2 parts to this program. The first part is the GUI. There is a call to fluid page that takes an undefined number of arguments that describe the widgets on the page. Each widget is itself a function call that takes parameters or other objects created by other functions. In the basic design, we have a title, a slider, and a plot.

On the server side we have a server object created by a function that has input and output objects. To make the GUI change, we define a distPlot sub-variable to output. We can call this anything. It just has to match what's on the GUI side. This variable is initialized by a renderPlot function which takes a few parameters to describe what to plot. It knows what to plot based on a sub-variable from the input argument, bins. This could be named anything but it has to match what the slide control has or nothing will happen.

The server side and GUI side are tied together with a function call to ShinyApp at the bottom. This is what runs the program. Under the hood, RStudio starts up a little web server that runs a cgi-bin application with an R environment that your app gets loaded into. On the front end it opens a little web browser and connects to the web server on localhost. The cgi-bin starts your session and sends a web page to draw. When you change anything in the web page, it sends a post to the cgi-bin with a new copy of all the variables in the GUI. This  immediately triggers the server code and it responds with an updated web page.

There is a nice and detailed tutorial video created by the RStudio developers if you wanted to learn more. I found it very helpful when learning Shiny. You can also browse around the widget gallery mentioned earlier. In it you can see the source code for all of these little examples.

Now let's do a simple program that does something with audit data. A long time ago, we learned how to do bar charts. That was a pretty simple program. Let's re-fit that code to run as a shiny app so that we tell it how to group the audit data.

library(shiny)
library(ggplot2)

# Read in the data and don't let strings become factors
audit <<- read.csv("~/R/audit-data/audit.csv", header=TRUE, stringsAsFactors = FALSE)
fnames <<- colnames(audit)
fnames[5] <<- "HOUR" # Change serial number to HOUR
audit$one <<- rep(1,nrow(audit))
# Create time series data frame for aggregating
audit$posixDate=as.POSIXct(paste(audit$DATE, audit$TIME), format="%m/%d/%Y %H:%M:%S")
# Create a column of hour and date to aggregate an hourly total.
audit$HOUR <- format(audit$posixDate, format = '%Y-%m-%d %H')
ourColors <<- c("red", "blue", "green", "cyan", "yellow", "orange", "black", "gray", "purple" )

# Define UI for application
ui <- shinyUI(fluidPage(
  # Application title
  titlePanel("Audit Barcharts"),

  sidebarLayout(
    sidebarPanel(
      selectInput("groupBy", "Group By", fnames, selected = "HOUR"),
      selectInput("lowColor", "Low Color", ourColors, selected = "blue"),
      selectInput("highColor", "High Color", ourColors, selected = "red"),
      width = 3
    ),
    # Show a plot of the generated distribution
    mainPanel(
      plotOutput("barPlot", width = "auto", height = "600px"),
      width = 9
    )
  )
))


# Define our server side code

server <- shinyServer(function(input, output) {
  observeEvent(c(input$groupBy, input$lowColor, input$highColor), {
    # Now summarize it
    grp <- input$groupBy

    temp <- aggregate(audit$one, by = audit[grp], FUN = length)
    temp$t <- as.character(temp[,grp])

    if (grp == "HOUR") {
      # Time based needs special handling
      final = data.frame(date=as.POSIXct(temp$t, format="%Y-%m-%d %H", tz="GMT"))
      final$num <- temp$x
      final$day <- weekdays(as.Date(final$date))
      final$oday <- factor(final$day, levels = unique(final$day))
      final$hour <- as.numeric(format(final$date, "%H"))

      output$barPlot<-renderPlot({
        pl <- ggplot(final, aes(x=final[,1], y=final$num, fill=final$num)) +
          geom_bar(stat="identity") + ggtitle(paste("Events by", grp)) +
          scale_x_datetime() + xlab("") + labs(x=grp, y="Number of Events") +
          scale_fill_gradient(low=input$lowColor, high = input$highColor, name=paste("Events/", grp, sep=""))
        print(pl)
      })
    } else {
      # non-time conversion branch
      final <- temp[,1:2]
      colnames(final) = c("factors", "num")
      final$factors <- abbreviate(final$factors, minlength = 20, strict = TRUE)

      # We will rotate based on how dense the labels are
      rot <- 90
      if (nrow(final) < 20)
        rot <- 60
      if (nrow(final) < 10)
        rot <- 45

      # Plot it
      output$barPlot<-renderPlot({
        pl <- ggplot(final, aes(x=final[,1], y=final$num, fill=final$num)) +
          geom_bar(stat="identity") + ggtitle(paste("Events by", grp)) +
          scale_x_discrete() + xlab("") + labs(x=grp, y="Number of Events") +
          scale_fill_gradient(low=input$lowColor, high = input$highColor, name=paste("Events/", grp, sep="")) +
          theme(axis.text.x = element_text(angle = rot, hjust = 1, size = 18))
        print(pl)
      })
    }
  })
})

# Run the application
shinyApp(ui = ui, server = server)


Make sure you have ~/R/audit-data/audit.csv filled with audit data. Save the above code as app.R and run it. You should see something like this:


Also notice that you can change the selection in the text drop downs and the chart is immediately redrawn. Briefly, the way this works is we setup some global data in the R environment. Next we define a GUI that has 3 selector inputs. All of the hard work is in the server function. What it does is wait for either of the 3 variables to change and if so re-draws the screen. We split the charting into 2 branches, time and everything else. The main difference is time variables need special handling. Basically we format the data to what's expected by the plotting function and pass it in. On the non-time side of things, we can get very dense groups. So what we do is rotate the text labels on the bottom if we start running out of room to fit more in.

Conclusion
This shows the basics of how a shiny app works. You can create very elaborate and complicate programs using this API. Now that we've been over Shiny basics, I'll talk about Audit Explorer next time.

Wednesday, July 5, 2017

Getting Torch running on Fedora 25

In this blog post we will setup the Torch AI framework so that it can be used on Fedora. This builds on the previous blog post which shows you how to setup a CUDA development environment for Fedora.


Torch
Torch is a Deep Learning AI framework that is written in LUA. This makes it very fast because there is little between the script and the pure C code that is performing the work. Both Facebook and Twitter are major contributors to this and have probably derived their in-house version from the open source version.

The first thing I would do is setup an account just for AI. The reason I suggest this is because we are going to be installing a bunch of software without rpm. All of this will be going into the home directory. So, if one day you want to delete it all, its as simple as deleting the account and home directory. Assuming you made the account and logged into it...

$ git clone https://github.com/torch/distro.git ~/torch --recursive
$ cd torch/
$ export CMAKE_CXX_FLAGS="-std=c++03"
$ ./install.sh


The Torch community say that they only support Torch built this way. I have tried to package Torch in rpm and it simply does not work. I get some strange errors related to math. There are probably compile options that fix this but I'm done with hunting this down. It's easier to use their method from an account just for this. But I digress...

After about 25 minutes, the build asks "Do you want to automatically prepend the Torch install location to PATH and LD_LIBRARY_PATH in your /home/ai/.bashrc? (yes/no)"

I typed "yes" to have it update ~/.bashrc. I logged out and back in. Test to see if the GPU based Torch is working:

luajit -lcutorch
luajit -lcunn


This should produce errors if its not working. To exit the shell, type:

os.exit()


At this point only one last thing is needed. We may want to play with machine vision at some point so get the camera module. And a lot of models seem to be trained using the Caffe Deep Learning framework. This means we need load it from that format so let's grab the loadcaffe module.

During the build of Torch, you got a copy of luarocks which is a package manager for LUA modules. We can use this to pull in the modules so that Torch can use them.

$ luarocks install camera
$ luarocks install loadcaffe


If you run the webcam from another account that is not your login account, then you need to go into /etc/group and find the video group and add the ai account as a supplemental group.


Quick Art Test
OK. Now lets see if Torch is working right. There is a famous project that can take a picture and transfer the artistic style of a work of art onto your picture. Its really quite astonishing to see. Let's use that as our test for Torch.

The project page is here:

https://github.com/jcjohnson/neural-style


To download it:

$ git clone https://github.com/jcjohnson/neural-style.git


Now download the caffe models:

$ cd neural-style/models
$ sh ./download_models.sh
$ cd ..


We need a picture and a work of art. I have a picture of a circuit board:


Let's see if we can make art from it. The boxiness of the circuit kind of suggests cubism to me. There is a web site called wikiart that curates a collection of art by style and genre. Let's grab a cubist style painting and see how well it works.

$ wget https://uploads7.wikiart.org/images/albert-gleizes/portrait-de-jacques-nayral-1911.jpg
$ mv portrait-de-jacques-nayral-1911.jpg cubist.jpg


To render the art:

$ th neural_style.lua -backend cudnn -style_image cubist.jpg -content_image circuit.jpg -output_image art.jpg


Using a 1050Ti GPU, it takes about 4 minutes and this is the results:


One thing you have to pay attention to is that if the picture is too big, you will run out of GPU memory. The video card only has so much working memory. You can use any image editing tool to re-scale the picture. The number of pixels is what matters rather than the size of the file. Something in the 512 - 1080 pixel range usually fits in a 4Gb video card.


Conclusion
At some point we may come back to Torch to do some experimenting on security data. But I find it to be fun to play around with the art programs written for it. If you like this, look around. There are a number of apps written for Torch. The main point, though, is to show how to leverage the CUDA development environment we previously setup to get one of the main Deep Learning frameworks installed and running on a modern Fedora system.

Thursday, June 29, 2017

Setting up a CUDA development environment on Fedora 25

The aim of this blog is to explore Linux security topics using a data science approach to things. Many people don't like the idea of putting proprietary blobs of code on their nice open source system. But I am pragmatic about things and have to admit that Nvidia is the king of GPU right now. And GPU is the approach to accelerate Deep Learning for the last few years. So, today I'll go over what it takes to correctly setup a CUDA development environment for Fedora 25. This is a continuation of the earlier post about how to get an Nvidia GPU card setup in Fedora. That step is a prerequisite to this blog post.

CUDA
CUDA is the name that NVidia has given to a development environment for creating high performance GPU-accelerated applications. CUDA libraries enable acceleration across multiple domains such as linear algebra, image and video processing, deep learning and graph analytics.These libraries offload work normally done on a CPU to the GPU. And any program created by the CUDA toolkit  is tied to the Nvidia family of GPU's.


Setting it up
The first step is to go get the toolkit. This is not shipped by any distribution. You have to get it directly from Nvidia. You can find the toolkit here:

https://developer.nvidia.com/cuda-downloads

Below is a screenshot of the web site. All the dark boxes are the options that I selected. I like the local rpm option because that installs all CUDA rpms in a local repo that you can then install as you need.


Download it. Even though it says F23, it still works fine on F25.

The day I downloaded it, 8.0.44 was the current release. Today its different. So, I'll continue by using my version numbers and you'll have to make the appropriate substitutions. So, let's continue the setup as root...

rpm -ivh ~/Download/cuda-repo-fedora23-8-0-local-8.0.44-1.x86_64.rpm


This installs a local repo of cuda developer rpms. The repo is located in /var/cuda-repo-8-0-local/. You can list the directory to see all the rpms. Let's install the core libraries that are necessary for Deep Learning:

dnf install /var/cuda-repo-8-0-local/cuda-misc-headers-8-0-8.0.44-1.x86_64.rpm
dnf install /var/cuda-repo-8-0-local/cuda-core-8-0-8.0.44-1.x86_64.rpm
dnf install /var/cuda-repo-8-0-local/cuda-samples-8-0-8.0.44-1.x86_64.rpm


Next, we need to make sure that utilities provided such as the GPU software compiler, nvcc, are in our path and that the libraries can be found. The easiest way to do this by creating a bash profile file that gets included when you start a shell.

edit /etc/profile.d/cuda.sh (which is a new file you are creating now):

export PATH="/usr/local/cuda-8.0/bin${PATH:+:${PATH}}"
export LD_LIBRARY_PATH="/usr/local/cuda/lib64 ${LD_LIBRARY_PATH:+:${LD_LIBRARY_PATH}}"
export EXTRA_NVCCFLAGS="-Xcompiler -std=c++03"


The reason CUDA is aimed at F23 rather than 25 is that NVidia is not testing against the newest gcc. So, they put something in the headers to make it fail.

I spoke with people from Nvidia at the GTC conference about why they don't support new gcc. Off the record they said they do extensive testing on everything they support and that its just not something they developed with when creating CUDA 8, but newer gcc will probably be support in CUDA 9.

Its easy enough to fix by altering one line in the header to test for the gcc version. Since we have gcc-6.3, we can fix the header to test for gcc 7 or later and then fail. To do this:

edit /usr/local/cuda-8.0/targets/x86_64-linux/include/host_config.h

On line 119 change from:

#if __GNUC__ > 5

to:

#if __GNUC__ > 6


This will allow things to compile with current gcc. There is one more thing that we need to fix in the headers so that Theano can compile GPU code later. The error looks like this:

math_functions.h(8901): error: cannot overload functions distinguished by return type alone

This is because gcc defines the function also and conflicts with the one NVidia ships. The solution as best I can tell is simply to:

edit /usr/local/cuda-8.0/targets/x86_64-linux/include/math_functions.h

and around lines 8897 and 8901 you will find:

/* GCC 6.1 uses ::isnan(double x) for isnan(double x) */
__DEVICE_FUNCTIONS_DECL__ __cudart_builtin__ int isnan(double x) throw();
__DEVICE_FUNCTIONS_DECL__ __cudart_builtin__ constexpr bool isnan(long double x);
__DEVICE_FUNCTIONS_DECL__ __cudart_builtin__ constexpr bool isinf(float x);
/* GCC 6.1 uses ::isinf(double x) for isinf(double x) */
__DEVICE_FUNCTIONS_DECL__ __cudart_builtin__ int isinf(double x) throw();

__DEVICE_FUNCTIONS_DECL__ __cudart_builtin__ constexpr bool isinf(long double x);

What I did is to comment out both lines that immediately follow the comment about gcc 6.1.

OK. Next we need to fix the cuda install paths just a bit. As root:

# cd /usr/local/
# ln -s /usr/local/cuda-8.0/targets/x86_64-linux/ cuda
# cd cuda
# ln -s /usr/local/cuda-8.0/targets/x86_64-linux/lib/ lib64


cuDNN setup
One of the goals of this blog is to explore Deep Learning. You will need the cuDNN libraries for that. So, let's put that in place while we are setting up the system. For some reason this is not shipped in an rpm and this leads to a manual installation that I don't like.

You'll need cuDNN version 5. Go to:

https://developer.nvidia.com/cudnn

To get this you have to have a membership in the Nvidia Developer Program. Its free to join.

Look for "Download cuDNN v5 (May 27, 2016), for CUDA 8.0". Get the Linux one. I moved it to /var/cuda-repo-8-0-local. Assuming you did, too...as root:

# cd /var/cuda-repo-8-0-local
# tar -xzvf cudnn-8.0-linux-x64-v5.0-ga.tgz
# cp cuda/include/cudnn.h /usr/local/cuda/include/
# cp cuda/lib64/libcudnn.so.5.0.5 /usr/local/cuda/lib
# cd /usr/local/cuda/lib
# ln -s /usr/local/cuda/lib/libcudnn.so.5.0.5 libcudnn.so.5
# ln -s /usr/local/cuda/lib/libcudnn.so.5.0.5 libcudnn.so


Testing it
To verify setup, we will make some sample program shipped with the toolkit. I had you to install them quite a few steps ago. The following instructions assume that you have used my recipe for a rpm build environment. As a normal user:

cd working/BUILD
mkdir cuda-samples
cd cuda-samples
cp -rp /usr/local/cuda-8.0/samples/* .
make


When its done (and hopefully its successful):

cd 1_Utilities/deviceQuery
./deviceQuery


You should get something like:

  CUDA Device Query (Runtime API) version (CUDART static linking)

Detected 1 CUDA Capable device(s)

Device 0: "GeForce GTX 1050 Ti"
  CUDA Driver Version / Runtime Version          8.0 / 8.0
  CUDA Capability Major/Minor version number:    6.1
  Total amount of global memory:                 4038 MBytes (4234608640 bytes)
  ( 6) Multiprocessors, (128) CUDA Cores/MP:     768 CUDA Cores
  GPU Max Clock rate:                            1468 MHz (1.47 GHz)
  Memory Clock rate:                             3504 Mhz
  Memory Bus Width:                              128-bit
  L2 Cache Size:                                 1048576 bytes
  Maximum Texture Dimension Size (x,y,z)         1D=(131072), 2D=(131072, 65536), 3D=(16384, 16384, 16384)
  Maximum Layered 1D Texture Size, (num) layers  1D=(32768), 2048 layers
  Maximum Layered 2D Texture Size, (num) layers  2D=(32768, 32768), 2048 layers
  Total amount of constant memory:               65536 bytes
  Total amount of shared memory per block:       49152 bytes
  Total number of registers available per block: 65536
  Warp size:                                     32
  Maximum number of threads per multiprocessor:  2048
  Maximum number of threads per block:           1024


<snip>

 You can also check the device bandwidth as follows:

cd ../bandwidthTest
./bandwidthTest


You should see something like:

[CUDA Bandwidth Test] - Starting...
Running on...

 Device 0: GeForce GTX 1050 Ti
 Quick Mode

 Host to Device Bandwidth, 1 Device(s)
 PINNED Memory Transfers
   Transfer Size (Bytes)    Bandwidth(MB/s)
   33554432            6354.8

 Device to Host Bandwidth, 1 Device(s)
 PINNED Memory Transfers
   Transfer Size (Bytes)    Bandwidth(MB/s)
   33554432            6421.6

 Device to Device Bandwidth, 1 Device(s)
 PINNED Memory Transfers
   Transfer Size (Bytes)    Bandwidth(MB/s)
   33554432            94113.5

Result = PASS


At this point you are done. I will refer back to these instructions in the future. If you see anything wrong or needs updating, please comment on this article.

Wednesday, June 28, 2017

Updated Rstudio srpm available


Due to the unexpected update to R 3.4 on Fedora 25 which is incompatible with the version of RStudio that I wrote about in this blog, I have spent the time to create a new srpm with an updated RStudio which runs on the new R 3.4. The release notes are here:

https://www.rstudio.com/products/rstudio/release-notes/

If you had previously built the version I blogged about, that would correspond with the 0.99a release. So, you can see in the release notes what new things have been added since then.

The source  (updated 08/11/2017)
https://people.redhat.com/sgrubb/files/Rstudio/

Building
The build process is very similar to the original instructions. Please review them if you are new to building rpms. In essence you download the srpm. Then:

rpm -ivh R-studio-desktop-1.0.146-1.fc25.src.rpm
rpmbuild -bb working/R-studio-desktop/R-studio-desktop.spec

Then install. This assumes you followed the directory layout suggested in an earlier post.

RStudio picked up one new dependency for qt5-qtwebchannel-devel. You may need to install it first.

This version seems to work with R-3.4 and I've had some time to do limited testing. The only issue I see so far is that audit-explorer (which I'm yet to blog about) seems to have a bug that needs fixing.

One note about R upgrades...you have to re-install all of your packages. So, if you have upgraded R and RStudio, you'll need to start running the install.packages("") command in the console portion of RStudio prior to running any programs.

Tuesday, June 27, 2017

PSA: R3.4 upgrade

If you have built your own version of RStudio from my instructions and srpm, do not upgrade to R 3.4. If you do, you will see a message like this:


R graphics engine version 12 is not supported by this version of RStudio. The Plots tab will be disabled until a newer version of RStudio is installed.

At some point I need to create a newer build of RStudio to take care of this problem. But in the mean time you might want to put an exclude statement in /etc/yum.conf or /etc/dnf/dnf.conf to prevent "R" from updating.

Update June 29, 2017. You can upgrade to the new R 3.4 if you then update your RStudio package as I mention in my next blog post.

Monday, June 26, 2017

Using auparse in python

A while back we took a look at how to write a basic auparse program. The audit libraries have python bindings so that can let you write scripts that do things with audit events. Today, we will take a look at previously given example programs for "C" and see how to recreate them in python. I will avoid the lengthy discussion of the how's and why's from the original article, please refer back to it if explanation is needed.

Now in Python
I was going to publish this blog post about 2 weeks ago. In writing the code, I discovered that the python bindings for auparse had bugs and outright errors in them. These were all corrected in the last release, audit-2.7.7. I held up publishing this to give time for various distributions to get this update pushed out. The following code is not guaranteed to work unless you are on 2.7.7 or later.

We started the article off by showing the basic application construct to loop through all the logs. This is the equivalent of the first example:

#!/usr/bin/env python3

import sys
import auparse
import audit

aup = auparse.AuParser(auparse.AUSOURCE_LOGS);
aup.first_record()
while True:
    while True:
        while True:
            aup.get_field_name()
            if not aup.next_field(): break
        if not aup.next_record(): break
    if not aup.parse_next_event(): break
aup = None
sys.exit(0)


Just as stated in the original article...it's not too useful but it shows the basic structure of how to iterate through logs. We start by importing both audit libraries. Then we call the equivalent of auparse_init which is auparse.AuParser. The auparse state is caught in the variable aup. After that, all functions in auparse are called similarly to the C version except you do not need the auparse_ part of the function name. When done with the state variable, it is destroyed by setting it to None.

Now let's recreate example 2 which is a small program that loops through the logs and prints the record type and the field names contained in each record that follows:

#!/usr/bin/env python3

import sys
import auparse
import audit

aup = auparse.AuParser(auparse.AUSOURCE_LOGS);
aup.first_record()
while True:
    while True:
        mytype = aup.get_type_name()
        print("Record type: %s" % mytype, "- ", end='')
        while True:
            print("%s," % aup.get_field_name(), end='')
            if not aup.next_field(): break
        print("\b")
        if not aup.next_record(): break
    if not aup.parse_next_event(): break
aup = None
sys.exit(0)


I don't think there is anything new to mention here. Running it should give some output such as:

Record type: PROCTITLE - type,proctitle,
Record type: SYSCALL - type,arch,syscall,success,exit,a0,a1,a2,a3,items,ppid,pid,auid,uid,gid,euid,suid,fsuid,egid,sgid,fsgid,tty,ses,comm,exe,subj,key,
Record type: CWD - type,cwd,
Record type: PATH - type,item,name,inode,dev,mode,ouid,ogid,rdev,obj,nametype,
Record type: PROCTITLE - type,proctitle,
Record type: SYSCALL - type,arch,syscall,success,exit,a0,a1,a2,a3,items,ppid,pid,auid,uid,gid,euid,suid,fsuid,egid,sgid,fsgid,tty,ses,comm,exe,subj,key,


Now, let's take a quick look at how to use output from the auparse normalizer. I will not repeat the explanation of how auparse_normalize works. Please refer to the original article for a deeper explanation. The next program takes its input from stdin. So, run ausearch --raw and pipe that into the following program.


#!/usr/bin/env python3

import sys
import auparse
import audit

aup = auparse.AuParser(auparse.AUSOURCE_DESCRIPTOR, 0);
if not aup:
    print("Error initializing")
    sys.exit(1)

while aup.parse_next_event():
    print("---")
    mytype = aup.get_type_name()
    print("event: ", mytype)

    if aup.aup_normalize(auparse.NORM_OPT_NO_ATTRS):
        print("Error normalizing")
        continue

    try:
        evkind = aup.aup_normalize_get_event_kind()
    except RuntimeError:
        evkind = ""
    print("  event-kind:", evkind)

    if aup.aup_normalize_session():
        print("  session:", aup.interpret_field())

    if aup.aup_normalize_subject_primary():
        subj = aup.interpret_field()
        field = aup.get_field_name()
        if subj == "unset":
            subj = "system"
        print("  subject.primary:", field, "=", subj)

    if aup.aup_normalize_subject_secondary():
        subj = aup.interpret_field()
        field = aup.get_field_name()
        print("  subject.secondary:", field, "=", subj)

    try:
        action = aup.aup_normalize_get_action()
    except RuntimeError:
        action = ""
    print("  action:", action)

    if aup.aup_normalize_object_primary():
        field = aup.get_field_name()
        print("  object.primary:", field, "=", aup.interpret_field())

    if aup.aup_normalize_object_secondary():
        field = aup.get_field_name()
        print("  object.secondary:", field, "=", aup.interpret_field())

    try:
        str = aup.aup_normalize_object_kind()
    except RuntimeError:
       str = ""
    print("  object-kind:", str)

    try:
        how = aup.aup_normalize_how()
    except RuntimeError:
        how = ""
    print("  how:", how)

aup = None
sys.exit(0)


There is one thing about the function names that I wanted to point out. The auparse_normalizer functions are all prefixed with aup_. There were some unfortunate naming collisions that necessitated the change in names.

Another thing to notice is that the normalizer metadata functions can throw exceptions. They are always a RuntimeError whenever the function would have returned NULL as a C function. The above program also shows how to read a file from stdin which is descriptor 0. Below is some sample output:

ausearch --start today --raw | ./test3.py

---
event:  SYSCALL
  event-kind: audit-rule
  session: 4
  subject.primary: auid = sgrubb
  subject.secondary: uid = sgrubb
  action: opened-file
  object.primary: name = /etc/audit/auditd.conf
  object-kind: file
  how: /usr/sbin/ausearch
---
event:  SYSCALL
  event-kind: audit-rule
  session: 4
  subject.primary: auid = sgrubb
  subject.secondary: uid = sgrubb
  action: opened-file
  object.primary: name = /etc/audit/auditd.conf
  object-kind: file
  how: /usr/sbin/ausearch


Conclusion
The auparse python bindings can be used whenever you want to manipulate audit data via python. This might be preferable in some cases where you want to create a Jupyter notebook with some reports inside. Another possibility is that you can go straight to Keras, Theano, or TensorFlow in the same application. We will eventually cover machine learning and the audit logs. It'll take some time to get there because there are a lot of prerequisite setups that you would need to do.

Friday, May 26, 2017

Installing a Nvidia Graphics Card on Fedora

So, maybe you have decided to get involved in this new Deep Learning wave of open source projects. The neural networks are kind of slow on a traditional computer. They have to do a lot of matrix math across thousands of neurons.

The traditional CPU is really a latency engine...run everything ASAP. The GPU, on the other hand, is a bandwidth engine. It may be slow getting started but it can far exceed the CPU in parallelism once its running. The typical consumer CPU is 4 cores + hyperthreading which gets you about 8 threads (virtual cores). Meanwhile, an entry level Pascal based GeForce 1050 will give you 768 CUDA cores. Very affordable and only 75 watts of power. You can go bigger but the smallest is huge compared to a CPU.

I've looked around the internet and haven't found good and complete instructions on how to setup for an Nvidia video card on a current version of Fedora. (The instructions at rpmfusion is misleading and old.) So, this post is dedicated to setting up a Fedora 25 system with a recent Nvidia card.

The Setup
With your old card installed and booted up...

1) Blacklist nouveau
# vi /etc/modprobe.d/disable-nouveau.conf
add the next line:
blacklist nouveau

2) Edit boot options
# vi /etc/default/grub
On the GRUB_CMDLINE_LINUX line
add: nomodeset
remove: rhgb
save, exit, and then run either
# grub2-mkconfig -o /boot/grub2/grub.cfg
Or if a UEFI system:
# grub2-mkconfig -o /boot/efi/EFI/<os>/grub.cfg
(Note: <os> should be replaced with redhat, centos, fedora as appropriate.)

3) Setup rpmfusion-nonfree:
# wget https://download1.rpmfusion.org/nonfree/fedora/rpmfusion-nonfree-release-25.noarch.rpm
# rpm -ivh rpmfusion-nonfree-release-25.noarch.rpm


4) Enable rpmfusion-nonfree
# vi /etc/yum.repos.d/rpmfusion-nonfree.repo
# vi /etc/yum.repos.d/rpmfusion-nonfree-updates.repo

In each, change to:
enabled=1

4) Update repos
# dnf --refresh check-update

See if new release package
# dnf update rpmfusion-nonfree-release.noarch

5) Start by getting rid of nouveau
# dnf remove xorg-x11-drv-nouveau

6) Install current nvidia drivers:
# dnf install xorg-x11-drv-nvidia-kmodsrc xorg-x11-drv-nvidia xorg-x11-drv-nvidia-libs xorg-x11-drv-nvidia-cuda akmod-nvidia kernel-devel akmod-nvidia --enablerepo=rpmfusion-nonfree-updates-testing

7) Install video accelerators:
# dnf install vdpauinfo libva-vdpau-driver libva-utils

8) Do any other system updates:
# dnf update

9) Shutdown and change out the video card. (Note that shutdown might take a few minutes as akmods is building you a new kernel module for your current kernel.) Reboot and cross your fingers.

Conclusion
This should get you up and running with video acceleration. This is not a CUDA environment for software development. That will require additional steps which involves registering and getting the Nvidia CUDA SDK. I'll leave that for another post when I get closer to doing AI experiments with the audit trail.